
I
know I haven't posted anything real in years but I'm back now to share my
recent research and project on Turning Pigments into Pressed Eye
Shadows. Hey, still pigment related!
Warning up front: this is a very long post with a lot of information and quite a few links.
All blue sections are reprinted from TKB Trading pages (with permission)
Warning up front: this is a very long post with a lot of information and quite a few links.
All blue sections are reprinted from TKB Trading pages (with permission)
I
haven’t worn makeup regularly in close to 20 years so what makeup I did have
needed to be tossed and I wasn't worried about replacing it, until I decided I needed
to wear it for an upcoming event. Off to Walmart we went and over to the
cosmetics isle where I was immediately overwhelmed by the selection, bright
lighting and prices. You mean I have to actually pick something that matches
me, not just a color I like? The horror… I’m fine with "drugstore
makeup" but I still have sticker shock- replacing all the
"essentials" (foundation, concealer, eye shadow, blush, mascara, lip
stick) was more than I wanted to spend on stuff that I’m going to use less than
a handful of times. I knew I could potentially make the eye shadow and save a
few $$$, especially since I already own the color, but I didn't know how
involved that project would be- or what else it would require- so I did some
research.
I consulted blogs, youtube videos and TKB Trading's website (because they sell
everything you need to get started) but found that there isn't much current
information about pressing your own eye shadows. Many of the posts and videos
were from 2010-2016 and didn't use the same ingredients or go through the same
process as those posted later- but it did teach me that there are a lot of ways
to do it. Below are the links to videos and posts I found most helpful
and the years they were published. I should also add that I was not looking
for help on creating matte eye shadows because I don’t own any matte pigments
and they require grinding and a different recipe formulation. I'm aiming for simple.
1) TKB Trading's Pressed Powder Kit instructions. This is copyrighted 2010 and go with the Press Your Own Makeup Kit, sold for $16.65. Of course it describes what is included in the kit but it also tells you the other items you'll need, a brief explanation about pressed powder cosmetics, the ingredients, and a “sample recipe” along with step-by-step instructions.
*The sample recipe was 1/2 teaspoon color, 2 scoops Press Base, 3-5 drops Binder. It looks like the scoops provided are their 15cc scoops.
2) A
brief instructional
video, 1:34 minutes long, done by TKB
Trading. The link
is found on the Press
Your Own Makeup Kit mentioned in #1 and is from 2011. There is no speaking, just
background music but there are captions. A good visual to go along with the written instructions.
*The recipe used here is the same as in the written instructions- 1/2 teaspoon color, 2 scoops Press Base, 3-5 drops Binder.
*The recipe used here is the same as in the written instructions- 1/2 teaspoon color, 2 scoops Press Base, 3-5 drops Binder.
3) Everything
You Need To Know About Pressing Pigments and Minerals, approximately
27 minutes, done by "Beautynewbie" in 2010. The link provided by TKB
on a support article, “How to Make Pressed Eye Shadow”.
A
few observations/notes of mine:
-She used
TKB’s Matte Texture base instead of the Press Base along with TKB’s binder
(Pressing Medium).
-She seemed
to be using a lot of alcohol, and didn’t press in multiple layers.
-Rather
than using pressing ribbon, tiles or a tamper tool, she used a quarter wrapped
in a paper towel (which is totally fine).
-She
also did all her mixing right in the empty pan.
-I'm pretty
sure the scoops she used are from TKB’s plastic recipe scoop set, seen here.
4) DIY Eyeshadows
Make Your Own with Mica's and Pigments Part 1, 28 minutes long, done by by
"Beauty By Trish Oliver" in 2015.
Another in-depth instructional video.
A
few observations/notes of mine:
-She used
the Cap 5 preservative rather than the Cap 2 I chose, also ok because TKB says
both will work. She added it to the mixture rather than adding it to the
Pressing Medium as TKB’s suggested)
-She
too uses TKB’s Matte Texture Base in this video instead of the Press Base.
-She
uses small containers for mixing in that she can throw away afterwards rather
than cleaning and reusing them (and that does save time).
-She
shakes the container of base + color to mix it up well instead of stirring.
-For
the base, the scoops she used are the “medium” plastic spoon, or the 15cc
scoop which is the same size.
-For
the mica, she called the spoon “the large scoop” which I assume is from the same
set.
*The recipe was 3 large scoops mica, 1 medium scoop of Matte Texture Base, 9 drops Pressing Medium.
*The recipe was 3 large scoops mica, 1 medium scoop of Matte Texture Base, 9 drops Pressing Medium.
5) Pressed
Mica Eye Shadow & Highlighter, a blog entry from Adventures of Lolo, dated 2016. This
is very nicely organized and has a lot of helpful information, including
step-by-step instructions, some recipes and a video she made at the end of the
post. I didn’t use the video for reference, the written instructions were
enough for me.
An observation
of mine:
-She
doesn’t use TKB’s Pressing Medium, she uses glycerin along with TKB’s Cap 5
preservative (she later says she stopped using it and was going to purchase
TKB’s binder).
-She used
the same 5 spoon set that I did.
*The amounts she used of mica, Press Base and Pressing Medium vary by color recipe provided.
*The amounts she used of mica, Press Base and Pressing Medium vary by color recipe provided.
6)
There is also a review from 2018 on TKB's Press
Your Own Makeup Kit, (on page 2) where the reviewer Stephanie P.
lists her most successful pressing process and 57 people found it helpful so
there must be something to it. There is no way to link the exact review so here
it is:
So
first, this is an awesome little kit & it's going to give you the basics of
what you need. Here are my recommendations: When you order the kit, also order
at least 4 colors a bunch of the little, white mixing scoops to go with it.
Once it's on the way, go to Walmart and get yourself a couple of little shot
glasses, dedicated measuring spoon and a small spray bottle. To make the
shadow, mix 1/2 teaspoon of your chosen color and 2 little white scoops of
pressing mix in a shot glass. Mix it really well and make sure you're not
seeing any of the white powder. Start adding the liquid medium in about 3 drops
at a time and mix REALLY well each time. I live where it's very dry and I
needed 12 drops. Once it's all mixed and sticking together nicely, spray your
pan with alcohol and add 2 drops of the liquid medium. Start layering in your
shadow, a little at a time. Press between each thin layer and spritz with more
alcohol before adding another layer. I pressed each pan 6-7 times in thinner
layers and got really good results. Once I had it filled, I once again spritzed
the top with some alcohol to finish it off. My shadows came out nicely.
*1/2 teaspoon color, 2 scoops Press Base, 12 drops Binder
*1/2 teaspoon color, 2 scoops Press Base, 12 drops Binder
I
also poured through their relevant support articles and the Questions/Answers on
each of the following TKB Trading items:
As to why I chose
the Cap 2 preservative over the Cap 5 later, and why I added it to the liquid
binder instead of the powder, I read two things. The first is on a TKB Trading support article here
titled, “How many drops in [x]?”
If you're making a pressed eye shadow, we recommend that you directly
put the preservative in your liquid binder (whether it's the TKB MyMix Press
Medium or jojoba oil). That means if you have 1/2 fl oz bottle of binder you'll
only need 1-2 drops of preservative.
Then in the
Q&A on the Cap 2 preservative, there is this:
Q: Which is better for pressing eye shadows: Preservative Cap-2 or
Cap-5?
A: Either is fine. Our Cap-2 may
be a better option simply because it is more "oil friendly".
Here is another
“helpful” hint to keep you from making the same mistake I did. You can buy the Press
Your Own Makeup Kit and the additional supplies separately but in the kit, the
preservative is already added to the binder. If you purchase all the
supplies individually as I did, you will
need to buy the preservative- I hadn’t caught that in the description for the
kit and needed to place a second order for the Cap 2. It did provide an excuse to pick up some more pigment samples though.
What
I used and bought (so you can get an idea):
Dotting tool for nail art (used for mixing)
Large bobby pin (used for mixing)
Paper Towels
Eye dropper
90% Isopropyl Alcohol
Spray bottle of alcohol
Q-tips
Q-tips
Small containers for mixing in- You can use small bags instead, I just prefer containers.
Micas from TKB Trading, Coastal Scents and The Conservatorie*
Micas from TKB Trading, Coastal Scents and The Conservatorie*
*Please
note that most of the pigments I used were purchased between 2010-2016 and while I don't know if they have a shelf life/expiration date, I've had them stored in a cool, dry and dark area so I am not worried about using them anyway; they look and
perform as though they were new. That being said, I'm
not suggesting you do the same; TKB Trading
sells a ton of pigments in sample sizes (average is 6 grams) for as low as
$1.65 each so you can afford to play with "fresh" product.
And remember to make sure that each one is a
cosmetic pigment and approved for use around the eyes- that's very important. TKB
Trading allows
you to sort the pigments they sell by approved use but you can also check out
the packaging they came in as that info is usually on the label. Luckily, I'd
also saved a word document of old store inventory so I was able to check my
pigments from The Conservatorie and Coastal
Scents as well.
The basic
formula provided by the various sources above for the mica/press base ratio
is:
1/2
teaspoon of color (mica) with "2 scoops" of Press Base
Allow
me to convert that for you. The Tad spoon from the 5 spoon set is 1/4 teaspoon
so 2 Tads is 1/2 teaspoon. The "scoops" they refer to are usually the 15cc plastic scoops TKB
sells and is equal to the Drop spoon so that would be 2 Drops of Press Base.
2
Tads of mica + 2 drops of Press Base- and that's enough to fill a 26mm round
pan.
Here’s
a chart I added to that can help with size conversation and equivalents between TKB’s 3 piece Plastic Recipe Scoops, the 5 piece metal spoons and their small plastic scoops. This does not include their metal 3
spoon set because “The Mini Spoon 5 set can be used to replace our beloved (but
plastic) Recipe Scoops. This Mini Spoon 3 Set cannot.”
*Lolo's post helped fill in some of these equivalents.
*Lolo's post helped fill in some of these equivalents.

TKB Trading themselves did not provide a “one size fits
all” ratio of base/binder for pressing pigments so I took their sample recipe
and the others used in the videos/post and sort of averaged it out to this:
2
Tads of mica + 2 Drops (the spoon) of Press Base
12
drops of Pressing Medium (the above references used between 3-12 drops).
6-7 drops of 90% Isopropyl Alcohol
My
reasoning and formula is based on these:
Q&A on TKB’s Press
Base (the powder)
Q: Hello, in proportion, how many parts of MyMix vegan should I use and how many parts of mica?
A: Approximately a 1/16th teaspoon of MyMix
powder to 1 teaspoon of mica.
Q&A
on TKB’s MyMixPressing Medium (the liquid binder)
Q: Hi, so I
make pressed eyeshadows with MyMix base and MyMix binder but my eyeshadows turn
out really not hard, and whenever I try to use them they fall apart- what can
be the reason? Can it be because micas are minerals?
A: Mica does
not naturally like to stick together so that is why we offer the MyMix Base to
help them stick (think of it like the glue that gets activated by the MyMix
Binder).
If your
product isn't sticking well, consider wetting your powder with Isopropyl
Alcohol (rubbing alcohol) but leaving all the other percentages the same for
the other ingredients. The extra moisture may help the dry binder really mix
well with the mica and make it be fully activated as a "glue".
Q: Does too much of this make the powder cake up too hard to where there is hardly no color payout? I tried mixing this along with MyMix powder base, Jojoba Oil, and your Cotton Candy color and alcohol to wet it and once pressed, it dried up a little hard but certainly no color payout at all. What did I do wrong?
A: The main culprits for a too hard base with poor payout are:
1. Alcohol. This wets the powders and then dries off quickly. Too much on the surface gives poor payout at first.
2. Using a matte powder with nothing to texturize or loosen it. If you only pressed a mica powder this should not be an issue for you. Mica doesn't stick together as readily as pure pigment so it is naturally a little softer or even crumbly in a cake unless you add the binding powder.
3. Too much binding powder. The My Mix Liquid Binder is a slow drying oil and is the least of your worries in all this.
Q&A
on TKB’s Press
Your Own Makeup Kit
Q: I have made a few of these & they are not filling the
tins & don't get wet enough. What should I add to make them wetter?
A: In addition to the slow drying oil that is the MyMix
Pressing Binder (which you could add more of), consider wetting with alcohol.
You can add quite a bit of alcohol as it will dry off quickly but it will wet
the powders enough.
You still with me? I know, information overload but it only
makes sense to explain why I ended up doing things the way I did. Now that I have,
I can share with you the process I went through. By the time this entry is posted, I
will have pressed around 48 pigments and hopefully I'm more comfortable with what I
am doing and have refined it as much as is possible. I timed myself one day and completed one 26mm eyeshadow in 30 minutes so think ahead about how many you want
to make and plan your schedule accordingly; I made 12 the first day- 6 hours steady
work.
I gathered all my supplies in one place and prepared the
area I was going to work in.
 |
| My secondary work area |
The Supplies: tin
pans, press tile, tamper tool, Pressing
Medium (liquid binder), Press
Base (the powder base), the preservative Cap 2 or 5, pressing ribbon, the
Tad & Drop spoons, dotting
tool for nail art & bobby pin (used for mixing), paper towels, eye dropper, q-tips, 90%
Isopropyl Alcohol, spray
bottle of alcohol, and small
containers for mixing in
I used these small plastic ones from the craft section at Dollar Tree. They are small but still large enough to hold the mixture and allow you to stir without spilling.
I used these small plastic ones from the craft section at Dollar Tree. They are small but still large enough to hold the mixture and allow you to stir without spilling.

After
I had my stuff together, I cleaned the surface of my table, the containers and tools
with alcohol and washed my hands. I protected the table with a plastic
place-mat from the Dollar Tree and a layer of paper towels on top of that. My table has a wood top so if yours does too, be more careful
than I was because liquid binder left a spot where I spilled it on
just paper towel.
My
first step of the pressing process was to add the preservative to the Pressing
Medium- my bottle is the 1/2 oz so I added two drops of preservative to the
bottle of binder, shook it, and let it settle. I didn’t start again
until the next day so it had ample time.
Next I cleaned the 26mm pan I was going to use- a drop of alcohol in the middle (here’s where
a dropper bottle or an eye dropper comes in handy), swirled it around with a
q-tip and put it aside to let dry. That doesn't take long.
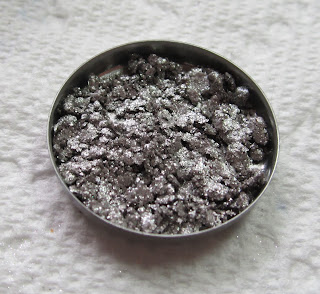
I grabbed
my container, and the Tad and Drop spoons, added to the container 2 level Tads
of mica (TKB's Grape Parfait was the 1st) and 2 Drops of Press Base- these weren’t heaping Drops but I didn’t
level them completely either.
 |
| Drop spoon of Press Base |
Then
I took my the small end of a dotting tool (you can use whatever you’d like to
mix with, I later switched to a open bobby pin) to carefully stir
the press base and mica together, then stirred
a few more times to be thorough. Lesson 1 for me: Stir the mixture, don’t
shake; shaking it just makes a mess when you take the lid off.
Next,
I added 12 drops total of pressing medium to the mica/base mix, 3-4 drops at a
time and mixed well with the dotting tool. The sources I
cited above recommended amounts between 3-12 drops so I ended up doing 12. You’re
supposed to be looking for a consistency like “wet sand” but I wasn’t quite
there yet at 6 or 9 drops.
I
added 6-7 drops of alcohol with the eye dropper and mixed that in well, starting seeing something like "wet sand" because it was clumping up on my tool and on the sides of the
container. I certainly wasn’t getting small puffs of dry powder anymore as I stirred.


Then I prepared the pan. I added two drops of alcohol and one drop of
pressing medium to the bottom, then used my dotting tool to mix it and spread
it around until the bottom was covered.


Now comes the actual pressing part. TKB advises to press in multiple thinner layers because it will be easier to compress the shadow and requires less force:


Now comes the actual pressing part. TKB advises to press in multiple thinner layers because it will be easier to compress the shadow and requires less force:
When you press, you want to use slowly increasing
pressure -- not one hammer fall. This is because as you press down you
are also removing air pockets around the grains of pigment and you need to give
the air time to escape. If you do not, the pockets will be trapped inside
and your tablet will be prone to cracking.
The act of pressing itself may be accomplished by many
tools. Your goal is to obtain a Per Square Inch of Pressure (psi) between
500 - 2000. Your thumbs alone are only able to do about 400 psi and with
your body weight pressing down you can eek up to about 500 psi. Since we
are only meeting minimum standards, it is a good idea to fill our pan in three
layers. It takes more pressure to compact a single thick layer of powder than
three thin ones.
I did more layers than that, 4-6, as much as was needed
to either fill the pan or empty the container.
I used the (clean) Drop spoon to slowly add mixture to the
pan and then spread it out. Then I took the pressing ribbon, placed it over the
pan, lined up the pressing tile and pushed it down into the pan with the tamper
tool that had been wrapped in a piece of plastic wrap (for cleanliness). I
pressed hard.

After the first layer was pressed, I sprayed the top once
with alcohol, scooped and spread out another thin layer of base/mica mixture
with the Drop spoon, laid the pressing ribbon down and repeated the process
with the tamper, hard. Again, I did this until the pan was full or the mix was
used up. Lesson 2, don’t spray the pan with alcohol until after its pressed,
the stuff will fly.

When the final press is done, give it a spray of alcohol
and let it dry, at least 24 hours. As a result of Thanksgiving prep and
enjoyment, mine actually got over 48 hours to sit and dry.

I followed the same basic process with the next 48 eye shadows with the exception of:
-I stopped using the dotting tool to stir my mixture and used the end of the bobby pin instead. The reason is that the bobby pin was thinner so less could stick to it and it was better at scraping the sides of the container.
-I stopped using the tamper tool from TKB and just used a pressing tile because after a while, the handle of the tamper tool started to get to the palm of my hand and once, I pressed so hard that it turned in my hand, went sideways and busted the shadow I just pressed nice and flat. The pressing tile by itself does the same job just as well and is much easier on the hands to press repeatedly.
-I also stopped using the pressing ribbon for every layer and used a paper towel for all but the last one or two presses. The point of the ribbon, aside from absorbency, is to give your pressed shadow a nice, clean smooth surface and I like that, but paper towels are cheaper. As long as you press with it on the last layer or two, you still get the clean surface but use up less of the ribbon. It’s not expensive to buy, I’m just cheap and practical.
Below are photos of the shadows I have created. Digital cameras just don't like to properly photograph purples and my Canon Powershot is no exception so rather than edit the colors in Paint Shop Pro, I have three photos per "palette", different lighting in each one.
The links go to TKB Trading pigments that you can still buy, the #s next to each name correspond to the order that I made them in.
TC-The Conservatorie, TKB-TKB Trading, CS-Coastal Scents
Palette 1- Purples
Row
1: #19 Modified Concord (color recipe), #1 Grape Parfait-TKB, #3
Pansy- TC, #22 Modified Pure Purple (old color recipe)
Row
2: #6 Sagittaire- TKB, discontinued, #20 Blackstar Purple (color
recipe), #23 Modified Grapecicle (old color recipe), #16 Patagonian Purple-
TKB
Row
3: #17 Sparkling Violet- TC, #10 Violet- TC, #4 Orchid Shimmer- CS, #12 Magic Violet-
TC


Palette 2- Purples
Row
3: #13 MyMix
Pearly Plum- TKB, #21 Modified Antique Red- CS (added Hilite
Violet-TKB), #8 Black Amethyst-
TKB, #24 Blush, color mix of TKB's Gemtone Ruby & TC's Bubblegum Pink


For Palettes 3 & 4, I picked greens, browns, golds and some of my favorite pigments just because they are my favs like Taurus Orion, Capricorn Sea, Pisces Blue, Sparkle Blue. When I am done with Palette #4, the shadows from both 3 & 4 will be put into color order like Palettes 1 & 2. Some of them I forgot to use the pressing ribbon so the surface is a little rougher. Just two photos for each, daytime, with and without flash.


For Palettes 3 & 4, I picked greens, browns, golds and some of my favorite pigments just because they are my favs like Taurus Orion, Capricorn Sea, Pisces Blue, Sparkle Blue. When I am done with Palette #4, the shadows from both 3 & 4 will be put into color order like Palettes 1 & 2. Some of them I forgot to use the pressing ribbon so the surface is a little rougher. Just two photos for each, daytime, with and without flash.
Palette 3: Mixed
Row 1: #33 Aruban Coral- Coastal Scents, see TKB's Artisan
Coral, #48 Copperish (color mix), #32 Copper
Penny-TKB, #44 Crucible Red-TKB
Row 2: #41 Paradise Star Gold + Metallic Pearl Honey Tan- both CS, #25 Paradise Shimmer Tan- CS, #30 Australian Amber- TKB, #38 TKB Black mica + Metallic
Pearl Honey Tan- CS
Row 3: #39 TKB Black Mica + Metallic Pearl Bronze- CS, #37 Gold Rush- CS,
#42 24k Gold- CS, #43 Sparkle Gold- CS


Palette 4: Mixed
Row 1: #36 Goldstone- CS, #31 Antique
Gold- CS, link goes to TKB's, #40 Taurus Orion- TKB,
discontinued, #35 Duochrome Green Gold- CS
Row 2: #27 Pennsylvania Green- TKB, #34 Emerald-
TKB, #26 Capricorn Sea- TKB, discontinued, #29 Pisces
Blue-TKB
Row 3: #28 Sparkle Blue- TKB, discontinued #47 Crystal Ice- CS, #45 Polished Silver- TKB, #46 Black Mica-TKB


If you're curious and would like to see swatches of the pigments above, here are the links to previous entries with dry swatches.
Color Recipe for Modified Imitation Blackstar Purple
6 tad TKB Black mica
4 tad TKB Hilite Violet
2 smidgen TKB Purple Sparks
Color Recipe for Modified Concord
4 smidgen TKB Shimmer Grape Pop
10 smidgen TKB Deep Blue
Color Recipe for Modified Grapecicle
Coastal Scents prices on all the empty palettes are pretty awesome right now and the shipping was only $4.95 so if you need some, its a good time to stock up.
Closing thoughts:
-After pressing 12 eye shadows the first day, my arms were quite sore, not enough to deter me the next day but enough to make me modify how I was pressing them.
-It took the 36 eye shadows to use up the first 1/2 oz bottle of Pressing Medium- that's 13 drops each shadow, 12 in the mix and 1 in the pan (approximately 468 drops per 1/2 oz.)
-If a slightly uneven surface will bother you, don't try to use that last tiny bit of mixture because even when pressed, it won't be perfectly level.
-I’m not going to say I hit upon the “perfect formula” for
this project but I did get the job done, one swipe with my fingertip gets
plenty of color and the surface doesn’t immediately get dusty and break down but I also haven't worn them as eye shadow yet.
-Coastal Scents Gold Rush (no longer sold) was the only pigment that gave me trouble. It required more Pressing Medium and alcohol to become wet enough to press and even then the layers didn't want to bond. I suppose this could have been due to the larger particle size of the pigment.
-Thanks to two of my cats, I also know these shadows will A) hold the impression of a cat foot but not break apart after the drying period and B) didn’t break apart when a cat foot stepped on them an hour after being pressed. I'm yelling at her to get down and she's turning frantically to get away faster but the shadows held up. The eye shadows must be popular with my cats. This is two days later, I go into the room where the eye shadows are sitting and find two more cat toe prints. They weren't covered because a few were still drying.
-I encourage a little tweaking of formula and color. What works for me may not work as well for you (plus I am an amateur).
- This is supposed to be fun, don't stress yourself out if it takes a second to get the hang and rhythm of the process.
thank you for the great and clear information! :D
ReplyDeleteYou're welcome. Thanks for reading it!
DeleteHi there,
ReplyDeleteThank you so much for this lovely blog post! Glad you like the products! - TKB Trading