Links checked 12/12/13 As with all pictures, click to enlarge if desired.
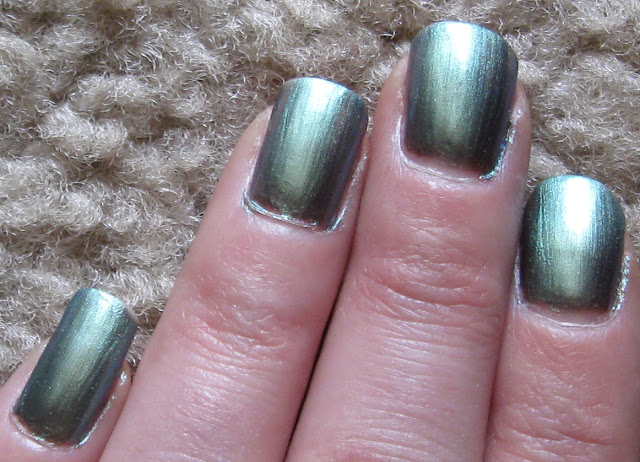
This is one of my franken polish experiments with TKB Trading's mica suspension Luster Base and with their pigment, Travel to Jupiter.
The required supplies were: TKB Trading's Smidgen spoon from the mini spoon set of five, BBs, a 15 ml bottle, TKB's Luster Base for mica suspension, L.A. Colors nail polish in Black Velvet, clear polish and the pigment Travel to Jupiter.
I dropped the 2 BBs in the bottle and marked the bottle in fourths with a permanent marker. This was intended as an experiment with diluting the suspension base (to cut down on expense) so I filled ¼ of the bottle with Luster Base and added approximately 30 drops of Black Velvet, making the bottle only slightly over ¼ full. The Luster Base and Black Velvet were opaque so I added ¼ clear polish. This made the base dark but a little translucent per TKB's suggested use.
Using the Smidgen spoon, I added 2 smidgen (not level spoons) of Travel to Jupiter and then ¼ more clear polish because, after all, I was testing the power of TKB's Luster Base.
I shook it well and tested it but since it was still too sheer for my taste I added 4 more smidgen of Travel to Jupiter. Even with that much pigment in it, it was still a 4 coat polish but several hours later it was also still suspended.
The next day I added 2 or 3 more smidgen making it a 3 coat polish instead of 4. The consistency was fine, not watery but not too thick and applied ok for me. It has also remained suspended for the past month.
The pictures you get to see this time are of my own nails and not those of my "models" because unlike most of the polishes I make, I actually used this one. I took the pictures the day after I painted my nails (which I did over two days) and before I did the cleanup. The lighting is daylight but no sun. To show the color shifting of green to aqua to blue I give you two sets of three photos. The color shifting is more dramatic under lamp light but the camera won't capture it.
So much to do, so little time and sunlight! -MK
Related Entries:


Thank you so much for explaining step by step how you do the frankening. The outcome is so beautiful!
ReplyDeleteI've been reading through your blog for more than an hour now and I've already learned soo much!
Thank you!!